After looking for another tutorial to link to and not finding one I decided I had to make my own.
I now have a new appreciation of the generous people who make tutorials and post them on their blog. Thank you. Tutorials are not as easy to do as I thought they would be.
Firstly I learnt I should have used a light plain fabric and clear contrasting thread so that everything was easier to see. So bear that in mind when you read my tutorial. Also that I have no time to do it again right now because I promised the kind lady I would make one as soon as possible. It has already taken a week of slaving away at the tutorial at night after work when I was already exhausted from talking to clients all day.
What You Need
40cm x 40cm (16") of exterior fabric
40cm x 40cm (16") of lining fabric
two buttons
cord (or ribbon like I used)
Instructions
Step 1:
Cut out one 40cm x 40cm square from both exterior and lining fabrics.
Please be more accurate than I was. If you think you may not be perfectly square when cutting out, then stay away from spotted fabric!
Step 2:
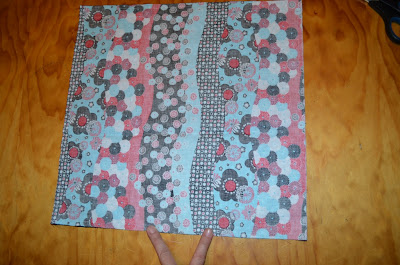
Pin and sew the two squares together. Right sides facing.
I used a 1cm seam as you can see (above).
Leave a gap of about 5cm to 8cm in one side so that you can turn right side out.
See my fingers. Am I doing bunny ears or the peace sign?
Step 3:
Clip all four corners to reduce bulk.
Step 4:
Turn right side out and press.
Ensure all four corners are pushed all the way out and are square.
Step 5:
Fold in half.
Step 6:
Fold the sides over until tip of triangle is flush to the other edge.
(This is where using a light coloured fabric would have been more useful to show what I am talking about!)
Fold the top corner down. Press entire project.
Step 7:
Draw lines on the crease lines. The lines on the sides will be your stitching lines.
Step 8:
Fold over the top and bottom flaps to the line marked and pin.
Sew across about 1/2" to form your casings.
My casing. If I didn't use spotted fabric you would probably not notice it looking so uneven.
Step 9:
Sew the sides. Follow those lines you drew in step 7.
Just wanted to show that not only do I cut wonky uneven squares of fabric but I sew wonky straight lines of stitching.
No don't do this. Sew yours straight.
Step 10:
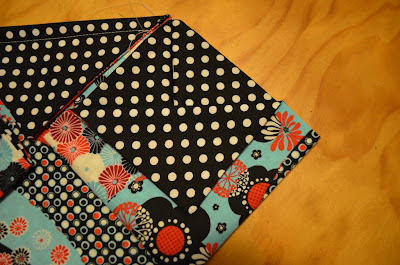
Origami fold the sides in to look like mini squares.
Step 11:
Fold the top flap of mini square over as in photo on left.
Step 12:
Stitch a button onto each side.
Step 13:
Stitch an embellishment to the front.
After making a couple of flowers for the front that all seemed too big, I got lazy and went ahead and used one. Personally I think a smaller flower would look better.
Step 14:
Pull your cord through the casings and voila! Your done!!!
Hope you like this tutorial and can follow my instructions well enough. If you can't my email is always a few clicks away.


8 comments:
Okay, now convert your measurements to imperial! Just kidding! Your tutorial is great and I love the fabric you used. Your bag is fantastic!
Have a great weekend!
Angela
So wonderful....I know lots of people are looking for a tutorial for this type of bag. Thanks for taking so much time to take all the photos.
Antmee, this is beautiful, and the colors are amazing. I think i will try it ;)
Lots of love,
Samya
Lovely fabric combo! Tutes are a lot of work but you did it. I appreciate what you have done.
You has a great blog. I'm very interesting to stopping here and leaves you a comment. Good work.
Lets keep writing and share your information to us.
Nb: Dont forget to leave your comment back for us.
Thank you for taking the time and trouble to let me know that indeed my word verification is not turned on! And seeing how we both
1) follow Jane on Projects by Jane
2) love to craft
I'm following your blog too!
Nice to meet you!
(although you do have your word verification on. Thought I'd let you know) :p
Super tutorial. many moons ago I made myself an origami bag. I thinkI went silly and made like 4 all at the same time. Hope you are well.
Thanks for this tutorial.....this is a different twist on making an origami fold bag and I really like it....thank you.
Post a Comment