After looking for another tutorial to link to and not finding one I decided I had to make my own.
I now have a new appreciation of the generous people who make tutorials and post them on their blog. Thank you. Tutorials are not as easy to do as I thought they would be.
Firstly I learnt I should have used a light plain fabric and clear contrasting thread so that everything was easier to see. So bear that in mind when you read my tutorial. Also that I have no time to do it again right now because I promised the kind lady I would make one as soon as possible. It has already taken a week of slaving away at the tutorial at night after work when I was already exhausted from talking to clients all day.
What You Need
40cm x 40cm (16") of exterior fabric
40cm x 40cm (16") of lining fabric
two buttons
cord (or ribbon like I used)
Instructions
Step 1:
Cut out one 40cm x 40cm square from both exterior and lining fabrics.
Please be more accurate than I was. If you think you may not be perfectly square when cutting out, then stay away from spotted fabric!
Step 2:
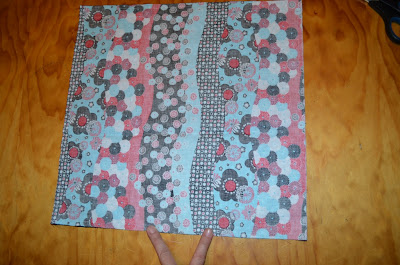
Pin and sew the two squares together. Right sides facing.
I used a 1cm seam as you can see (above).
Leave a gap of about 5cm to 8cm in one side so that you can turn right side out.
See my fingers. Am I doing bunny ears or the peace sign?
Step 3:
Clip all four corners to reduce bulk.
Step 4:
Turn right side out and press.
Ensure all four corners are pushed all the way out and are square.
Step 5:
Fold in half.
Step 6:
Fold the sides over until tip of triangle is flush to the other edge.
(This is where using a light coloured fabric would have been more useful to show what I am talking about!)
Fold the top corner down. Press entire project.
Step 7:
Draw lines on the crease lines. The lines on the sides will be your stitching lines.
Step 8:
Fold over the top and bottom flaps to the line marked and pin.
Sew across about 1/2" to form your casings.
My casing. If I didn't use spotted fabric you would probably not notice it looking so uneven.
Step 9:
Sew the sides. Follow those lines you drew in step 7.
Just wanted to show that not only do I cut wonky uneven squares of fabric but I sew wonky straight lines of stitching.
No don't do this. Sew yours straight.
Step 10:
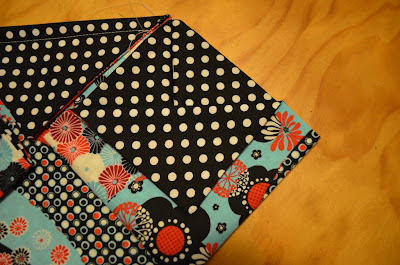
Origami fold the sides in to look like mini squares.
Step 11:
Fold the top flap of mini square over as in photo on left.
Step 12:
Stitch a button onto each side.
Step 13:
Stitch an embellishment to the front.
After making a couple of flowers for the front that all seemed too big, I got lazy and went ahead and used one. Personally I think a smaller flower would look better.
Step 14:
Pull your cord through the casings and voila! Your done!!!
Hope you like this tutorial and can follow my instructions well enough. If you can't my email is always a few clicks away.


